- a:link - a normal, unvisited link
- a:visited - a link the user has visited
- a:hover - a link when the user mouses over it
- a:active - a link the moment it is clicked
 /* unvisited link */
 a:link {
   color: #FF0000;
 }
 /* visited link */
 a:visited {
   color: #00FF00;
 }
 /* mouse over link */
 a:hover {
   color: #FF00FF;
 }
 /* selected link */
 a:active {
   color: #0000FF;
 }
Text Decoration
The text-decoration property is mostly used to remove underlines from links:
 a:link {
   text-decoration: none;
 }
 a:visited {
   text-decoration: none;
 }
 a:hover {
   text-decoration: underline;
 }
 a:active {
   text-decoration: underline;
 }
Background Color
The background-color property specifies the background color for links:
 a:link {
   background-color: #B2FF99;
 }
 a:visited {
   background-color: #FFFF85;
 }
 a:hover {
   background-color: #FF704D;
 }
 a:active {
   background-color: #FF704D;
 }
Below, I have given different ways to open control panel in Windows 8 and 8.1.
1. Right click on Windows  and click on Control Panel.
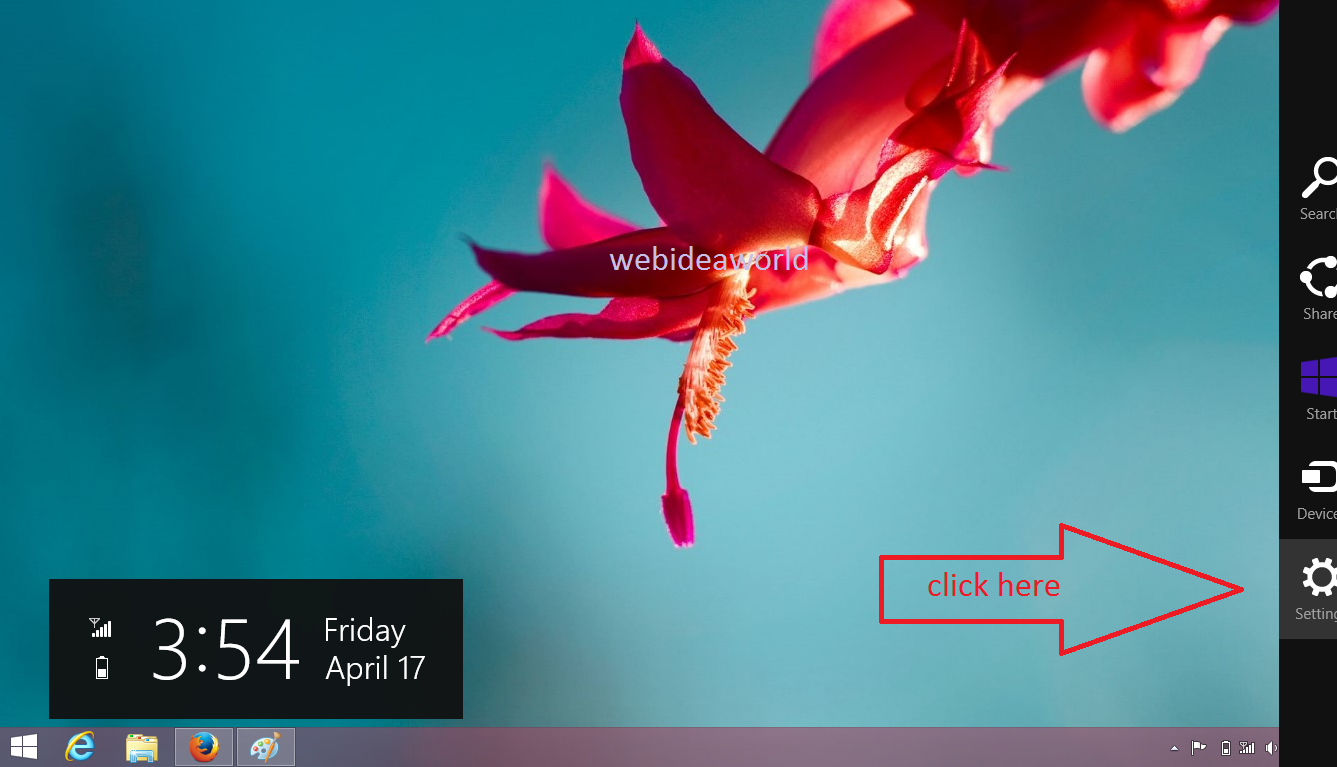
2. On your desktop, open the Charms Bar, click on the Settings charm, click on Control Panel.
Or you can directly open Settings charm by pressing Windows  + I keys.
3. Open Computer, In the Computer tab, click on Control Panel in the ribbon.
4. Open Computer, click on the first arrow on the left side in the address bar, click on Control Panel in the menu.
By following simple steps you can add Sleep or Hibernate to your PC's Power Option Menu :
1. Open Control Panel > Power Options.
Or you can directly open Power Options by clicking on battery icon.
2. Now click on "Choose what the power buttons do" link given in left sidebar.
3. Then click on "Change settings that are currently unavailable" link given at the top and scroll down to bottom.
4. You'll notice that "Hibernate" or "Sleep" option is unchecked. Enable the option and apply the changes.
5. That's it. Now you can see missing hibernate or sleep option in power menu of Windows 8 as shown in following screenshot:
Float an Image to Left : (use any one)
1. Add a style attribute to the image, and apply the float property:
<img src="image-sample.jpg" alt="image-caption" style="float:left;" />
2. You can add some margins to the image to increase its readability:
<img src="image-sample.jpg" alt="image-caption" style="float:left;margin:0 5px 0 0;" />
3. With CSS float, an element can be pushed to the left, allowing other elements to wrap around it.
 img
{
img
{
float: left;
}
Float an Image to Right : (use any one)
1. Add a style attribute to the image, and apply the float property:
<img src="image-sample.jpg" alt="image-caption" style="float:right;" />
2. You can add some margins to the image to increase its readability:
<img src="image-sample.jpg" alt="image-caption" style="float:right;margin:0 5px 0 0;" />
3. With CSS float, an element can be pushed to the right, allowing other elements to wrap around it.
img
{
float: right;
}
 USB Debugging grants you a level of access to your device. This level of
access is important when you need system-level clearance, such as when
coding a new app.USB Debugging Mode is a mode that can be enabled in Android after
connecting the device directly to a computer with a USB cable. The
primary function of this mode is to facilitate a connection between an
Android device and a computer with Android SDK (software development
kit).
1. Android 2.0-2.3.x
Settings > Applications > Development > USB Debugging
2. Android 3.0- 4.1.x
Settings > Developer Options > USB Debugging
3. Android 4.2.x and higher.
- Go to "Settings".
- Scroll down to the bottom and tap "About phone" or "About tablet",
- Scroll down to the bottom of the "About phone" and locate the "Build Number" field.
- Tap the Build number field few times to enable Developer Options.
Tap a few times and you'll see a countdown that reads "You are now 3
steps away from being a developer."
- When you are done, you'll see the message "You are now a developer!".
- Tap the Back button and you'll see the Developer options menu under System on your Settings screen.
- Go to Settings>Developer Options>USB Debugging. Tap the USB Debugging checkbox.
4. Android 5.0 Lollipop
- Settings > About Phone > Build number > Tap it few times to become developer
- Settings > Developer Options > USB Debugging
NOTE: To disable USB Debugging and other developer options when you don't need them, slide the switch at the top of the screen from On to Off.
To enable USB Debugging on Android 5.0 Lollipop
1. Settings > About Phone > Build number > Tap it few times to become developer
2. Settings > Developer Options > USB Debugging.
To disable USB Debugging and other developer options when you don't need them, slide the switch at the top of the screen from On to Off.
Disclaimer
We shall not be liable for the improper or incomplete transmission of the information contained in this communication nor for any delay in its response or damage to your system. We do not guarantee that the integrity or security of this communication has been maintained or that this communication is free of viruses, interceptions or interferences. Anyone communicating with us by email accepts the risks involved and their consequences. We accept no liability for any damage caused by any virus transmitted by this site.

 and click on Control Panel.


